")
Adding outdoor tiles can really level up the beauty and practicality of your patio, deck, or pathway. Taking on the project of installing outdoor tiling yourself can be super satisfying as a fun DIY adventure, not to mention it’s a great money-saver!
Plus, you get the freedom to customise your outdoor area exactly how you like it.
In this detailed guide, we’re gonna take you on a journey through the whole outdoor tiling installation process, step by step.
We’ve got you covered from the very beginning — all the prep work — to the finishing touches like grouting and sealing.
Let’s make your outdoor space look amazing together.
Step 1: Planning and Preparation
Before you start the tiling process for your outdoors, it’s super important to take some time to plan and get everything ready. This step is key to making sure that the end result turns out just the way you want it to.
Assess the Surface: Before you start laying down those tiles, take a good look around the area where you plan to install them. Check if everything is solid and free of any cracks, bumps, or random stuff lying around. If you spot any issues, do fix them up first before moving forward with the tiling process.
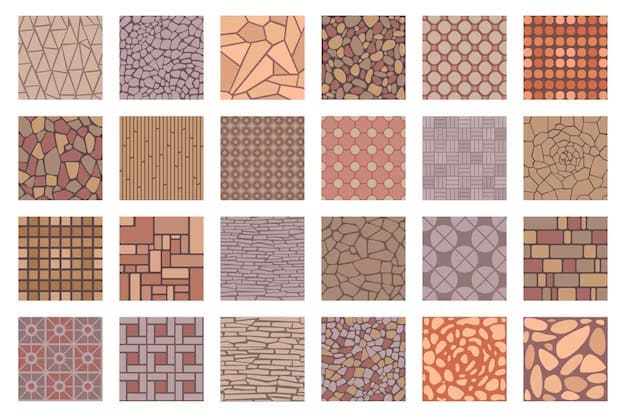
Choose the Right Tiles: When you’re picking out outdoor tiles, make sure to go for the ones that are specifically made for outdoor use and can handle whatever the elements throw their way. Take into account important things like how durable they are, their slip resistance to keep you safe, and of course, how good they look because you want your outdoor space to be both practical and easy on the eyes.
Gather Materials and Tools: Make a list of all the materials and tools you’ll need for the tiling installation, including tiles, adhesive, grout, spacers, a trowel, a tile cutter, a level, and safety gear such as gloves and goggles.
Plan the Layout: When figuring out how to lay down your tiles, think about stuff like the size and shape of each tile, as well as the overall dimensions of the space you’re working with. You’ll also want to consider any existing features or obstacles that might affect your tiling plan.
Step 2: Surface Preparation
Making sure you prep the surface properly is super important to make sure your outdoor tiling project turns out great and lasts for a long time. Trust us, taking the time to get this step right will save you a lot of headaches down the road!
Clean the Surface: Before installing those tiles, make sure you give the surface a good scrub down to get rid of any dirt, grease, or debris hanging around. Grab a pressure washer or a trusty scrub brush along with some detergent to really get that surface squeaky clean and ready for tiling action.
Apply Primer (if necessary): So, depending on what kind of surface and tiles you’re working with, you might wanna consider slapping on a primer to make sure everything sticks together real nice. Just follow the instructions that come with the primer — slap it on like they say, then make sure it’s all dry before you move on to the next step.
Lay the Foundation: To get started, grab some outdoor tile adhesive or mortar and slap a layer of it onto the prepared surface using a trowel. Make sure to spread that gooey goodness nice and even, covering every nook and cranny to ensure everything sticks together like peanut butter and jelly.
Set the Tiles: Gently place the tiles on top of the adhesive, making sure to press them down firmly and using spacers to keep that nice and even spacing between each tile. Don’t forget to grab a level to double-check that everything is perfectly aligned, and make any adjustments if necessary. It’s all about that attention to detail for a job well done.
Step 3: Cutting and Fitting Tiles
Let’s face it, when tiling a surface, it’s inevitable that you’ll have to bust out the tile cutter to trim some tiles to perfectly fit around those pesky edges, corners, and any other obstacles that get in the way of a seamless finish.
Measure and Mark: Grab a tape measure and pencil to measure and mark those tiles that need some cutting to fit perfectly. Don’t forget to consider any spacing or grout lines while you’re at it.
Cut the Tiles: To cut the tiles along the marked lines, you can use a tile cutter or a wet saw. Be sure to follow the instructions provided by the manufacturer for using these cutting tools safely and with precision. It’s important to handle them carefully to ensure clean and accurate cuts on your tiles.
Test Fit: After cutting the tiles, give them a test run by fitting them into their designated spots to double-check if they sit just right. If you notice any areas where they don’t quite match up perfectly, make those little tweaks and adjustments as required to get them looking spot on.
Step 4: Grouting and Sealing
Once the tiles are all laid down and set in place, the next step is to get groovy with some grouting action! This involves filling in the spaces between the tiles and then sealing them up tight to finish off the tiling installation process.
Mix the Grout: Get the grout ready by following the instructions given by the manufacturer, making sure it gets to that perfect consistency you’re aiming for.
Apply the Grout: Grab your trusty grout float and get ready to slather on that grout like a pro. Make sure you press it nice and firm into those gaps between the tiles, ensuring every nook and cranny gets covered. Take it slow by working in small sections, and if you happen to go overboard with the grout, just whip out a damp sponge to wipe off the excess from the tile surface.
Let it Cure: Let the grout chill and do its thing for the time recommended by the manufacturer, which is usually around 24 to 48 hours. It’s like giving it some space to set and solidify properly for best results.
Seal the Tiles: After the grout has fully set and hardened, it’s time to give those tiles some extra love and protection. Grab a good sealer to shield them from any potential moisture, stubborn stains, or accidental damage. Make sure to follow the instructions provided by the manufacturer on how to apply the sealer properly.
Let it dry entirely before you start using that freshly-tiled area.
Step 5: Finishing Touches
Once you’ve got those tiles all set up, grouted, and sealed in place, it’s time to put the cherry on top and add those final finishing touches to really bring your outdoor tiling project together.
It’s these little details that will make your space truly shine and showcase all your hard work.
Clean Up: Get rid of any sticky residue, leftover grout, or other bits and bobs that might be hanging around on the tiled surface by giving it a good wipe down with a damp sponge or cloth. This will help you achieve that squeaky-clean finish you’re aiming for.
Replace Furniture and Accessories: Once the tiles are completely dry and all set, you can jazz up your outdoor area by putting back all your patio furniture, plants, or any other decorations. This way, you can fully enjoy your freshly-tiled outdoor space with a cosy and inviting vibe.
Regular Maintenance: If you want to make sure your outdoor tiles stay looking fresh and fab, it’s important to do some regular upkeep. This can include simple tasks like sweeping away dirt and debris, giving them a good mop down every so often, and resealing them when necessary to keep them in tip-top shape.
Ready to upgrade your outdoor space with stylish tiles? Follow this simple guide to install them like a pro and elevate your outdoor game!
The secret sauce to nailing this project is all about good planning, thorough preparation, and flawless execution. By checking these boxes, you’ll be on track to achieving professional results that enhance both the appearance and usability of your outdoor space for years to come.
So, no time to waste — let’s get those sleeves rolled up, tools at the ready, and dive straight into this fun-filled DIY tiling adventure! If you need further help in this process, connect with our tilers in Sydney and also in Castle Hill, Campbelltown or Parramatta.