")
Sprucing up your outdoor space with some fancy outdoor tiling can really take it to the next level, bringing in some extra charm, usefulness, and even boosting the value of your place. Whether you’re revamping a patio, deck, or pool area, making smart choices with the tiles and getting them installed just right is key for a top-notch outdoor tiling gig.
In this jam-packed guide, we’ve got you covered on all fronts to help you nail that picture-perfect outcome and set up a beautiful outdoor tiled area that will stand the test of time.
Planning and Preparation:
Before you begin your outdoor tiling project, careful planning and preparation are key. Start by assessing the area where you’ll be tiling and determining the scope of the project. Measure the dimensions of the space and calculate the amount of tiles and materials you’ll need. Consider factors such as the climate, exposure to sunlight and moisture, and the intended use of the tiled area.
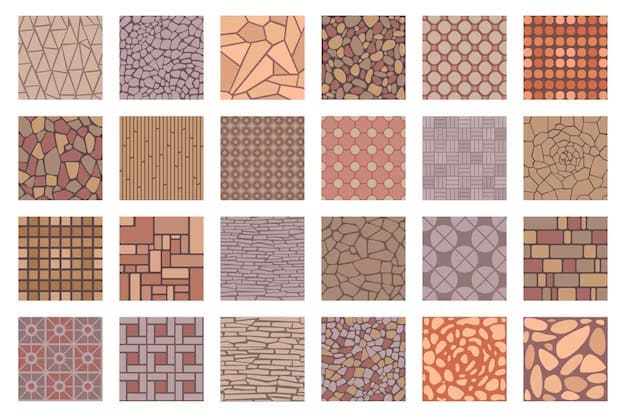
Choosing the Right Tiles
Go for tiles that are made specifically to handle the great outdoors, like porcelain, natural stone, or ceramic ones that can handle frost like a champ. Don’t forget to think about stuff like how slippery they are, the colour and texture you dig, and how big they are when you’re choosing tiles that will totally vibe with your outdoor style while also being practical for all your needs.
Surface Preparation:
Before you embark on your outdoor tiling project, remember that getting the surface ready is key to making sure it turns out just right.
First things first, give the surface a good scrub to get rid of any grime, debris, or old coatings hanging around.
Then, take care of any cracks, holes, or bumpy spots on the surface and make sure it’s nice, flat and sturdy.
To keep things watertight and secure those tiles in place, don’t forget to slap on a waterproofing layer or primer to shield the surface from moisture and help those tiles stick like glue.
Tile Installation Techniques:
When you’re gearing up to lay down some outdoor tiles, there are a bunch of different techniques out there for you to pick from.
You can go with the direct bonding method, use a mortar bed, or opt for pedestal systems — it’s all about what suits your project best.
The technique that will work like a charm for your specific job will depend on things like the type of tiles you have, what kind of surface they’re going on, and the conditions at your site.
Make sure to stick to what the manufacturer suggests and follow industry tips when it comes to getting those tiles down right — that includes using the right adhesive, grout, and spacing between each tile.
Cutting and Shaping Tiles:
Sooner or later, you’re going to have to trim those tiles to make them fit nicely around edges, corners, and any annoying obstacles in your outdoor area.
The best tools for this job include a trusty tile cutter, a wet saw for precise cuts, or an angle grinder with a diamond blade if you’re feeling all DIY-savvy.
Before getting into the cutting action, make sure to measure twice and mark those cutting lines on the tiles. And of course, safety first! Don’t forget your goggles and gloves for some added protection while you work your tiling magic.
Grouting and Sealing:
Once the tiles are installed, grouting is the next crucial step in the outdoor tiling process.
Choose a grout colour that complements your tiles and suits your aesthetic preferences. Mix the grout according to manufacturer instructions and apply it evenly between the tiles, ensuring full coverage and a uniform appearance.
After the grout has dried, seal the tiles and grout with a high-quality sealer to protect them from moisture, stains, and weather damage.
Maintenance and Care:
Taking good care of your outdoor tiled surface is super important to keep it looking gorgeous and lasting a long time.
Make sure you give those tiles some care by cleaning them regularly with a gentle detergent and water to get rid of any gunk, dirt, or stains that might be hanging around.
Steer clear of using any harsh chemicals or rough cleaners that could potentially harm the tiles or grout. Remember to keep an eye out for any signs of damage or wear and tear on the tiles, and fix up or swap out any damaged tiles or grout as necessary.
Tips and Tricks for Success:
- Always use high-quality materials and follow manufacturer recommendations for best results.
- Take your time and pay attention to detail during each step of the tiling process.
- Allow adequate time for the tiles to set and the grout to cure before using the tiled area.
- Consider hiring a professional tile installer for complex or large-scale outdoor tiling projects.
- Invest in proper drainage systems to prevent water accumulation and potential damage to the tiled surface.
By putting in some thoughtful planning, getting all prepped up properly, and paying attention to the little details, outdoor tiling has the power to really spruce up your outdoor area for many years ahead.
By sticking to the advice and cool tricks shared in this guide, you can totally nail it and end up with a jaw-droppingly outdoor tile area that will stand the test of time.
So get ready to enjoy your beautifully-tiled outdoor space for many years to come. Or if you need professional tilers in Sydney, Western Sydney, Campbelltown or Parramatta, please give us a call today.